Internet of Poop: How (and Why) I Built a Smart Litter Tray

Naturally, we want our pets to be as healthy and happy as possible, and just as with humans, one valuable metric to know is their weight. Knowing the weight of our four-legged friends, not only helps us to verify that they have a healthy amount of body fat, but can also can be used to detect things early on that may need medical attention. As they cannot speak to us and tell us when don’t feel well, it is our duty to listen to all of the different signals we have to understand their wellbeing.

Photo of a black shorthair cat sitting.

That’s why I wanted to know the weight of my cat, Ellie. Unfortunately, she really dislikes being picked up or handled, even by people she trusts. This means, it’s not possible to weigh her on a bathroom scale, and the only datapoint I have is her yearly examination at the vets. 

I wanted to build something that would fit into her life to track her weight automatically, without any intervention. I decided to modify her litter box, so that on each visit it records her weight.

But WHY, Andy?

Okay I get it; you think it’s weird. So here are the main goals of the project: 

  • Track Ellie’s weight because I want to know how heavy she is without going to the vet
  • Learn something about how load cells work
  • Have fun building a new project
  • (Hopefully) Inspire others to try out new ideas and projects by sharing what I learned. 
  • Track the weight of poops because I thought that was funny. 

The Hardware

Rather than build the whole litter tray from scratch, I decided to build a platform that her existing litter tray would rest on. This platform would contain all the equipment necessary to detect when Ellie was using the litter and start taking measurements.

Continue reading

Finding Your Happy Place: Demystifying the Challenges in Frontend and Backend Development and How You Fit In

Software engineering is a very broad profession with many different types of work you can do, each with their own opportunities and challenges, but have you ever wondered what those opportunities are? Perhaps you’ve feel your work isn’t challenging you enough, or your not motivated but what you do.

A picture of a woman working writing code.

Photo by ThisisEngineering RAEng on Unsplash

In this article, I want to take you though some of the different places software engineering can take you, and what the opportunities, challenges and rewards are for each of them. Hopefully by the end you will be more equipped to understand the challenges and opportunities available to you and how you can shape your career choices around what excites you.

Front End & Back End?

You’re probably familiar with the split into “frontend” and “backend” engineering, you’ve possibly seen somebody exclusivity describe themselves as a frontend / backend engineer.

Separations like this are a good start, and we tend to think we have a pretty good handle on what they mean, but I don’t think they tell the whole storey. This separation makes the assumption that each of these categories is a fundamentally different role. However, the core challenge and activities in all of these roles is the same; you’re using your creative human brain to find solutions to problems and convert those solutions into code.

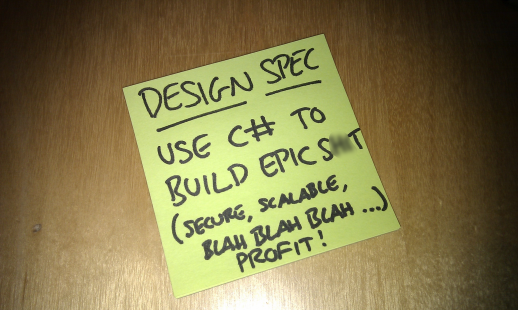
Or as a former manager of mine put it…

A post-it note reading "Design spec = Use C# to build epic s**t (secure, scalable, blah, blah...profit!)"

The biggest difference between front and back end development sits in two areas: The tools used to do your job and the problems you will be solving. Let’s dig into each of those a little deeper to see how they can effect the work you do.

Tools

No matter what you do, you probably use some kind tools, and those tools will be highly specialised to the task you are doing. For a mechanic these tools may looks like wrenches, screwdrivers or diagnostic devices. But for a software engineer these are more like the programming language, operating system, development frameworks and even development methodologies.

But here’s the thing: You are not your tools.

These tools exist to help you get your job done and may be different depending on what that job is. You shouldn’t allow yourself to become limited or defined by the tools you use. You chose them, you learned how to use them, but they are but an artefact of the problem you are solving not the definition of what you do.

The Problems Being Solved

The other difference is the actual problems you are trying to solve – the challenges you are facing on a daily basis. I’ve heard a lot of engineers over the years talk about how they don’t feel like their project is providing them with “real challenges”.

A image of a man and a woman working together on a computer

Photo by heylagostechie on Unsplash

For developers who work on the front end, this can often sound something like “all I do is call and API and render it on the screen; I don’t do any ‘real engineering’”. Whereas on the other side it can sound like “All I do is manipulate data and pass it to the UI; I’m too far from the real code that the user sees”.

Often when feeling this way, there is challenge available to them – but it’s not challenge that excites them, it’s not work that motivates them to get out of bed in the morning and go to work.

If this sounds sounds like you, perhaps you too are not solving challenges that motivate you. Understanding what challenges are available in different roles and knowing which ones inspire you most will empower you to make the right next move in your career (weather that be a new job, or a discussion with your manager to ask for different activities).

The Challenge Spectrum

So, it seems that a traditional frontend vs backend definition is not enough to articulate the different choices you can make to position yourself in a place to solve exciting problems and do your best work. Instead, I want to introduce you to the Challenge Spectrum.

The Challenge Spectrum spans from data & platform challenges to human & interaction challenges, taking in all possible roles you can occupy along the way, all of them as just important as the others. At several points along the spectrum, Ive annotated some example challenges you may face at that location.

Continue reading

An App To Transfer Files To The FlashForge Adventurer Or Monoprice Voxel

A little while back I wrote about how to use Cura with the Monoprice Voxel / FlashForge Adventurer 3, in that article I discussed how to create a printer profile and slice your models to produce a G-Code file. However, without using the bundled FlashPrint software, it was not possible to transfer the file over the network – instead needing to use a USB flash drive.

I wanted a lightweight app I could use to transfer files to my printer, so I’ve spent the last few weeks I’ve been building Adventurer Client to do just that. I wanted to use it as an opportunity to learn some new frameworks / technologies and I had a lot of fun building it. I thought it would be useful for other FlashForge & Monoprice users too, so now I’m ready to share it with you all.

Using Adventurer Client, you can connect to the printer, see its state and transfer already sliced gcode files to the printer.

Printer Compatibility

I’ve tested this with a Monoproce Voxel, which is a rebranded FlashFordge Adventure 3,  I believe this will work with other FlashFordge Printers too, but I don’t have access to any to test this. If you try the app with your printer and it works (or does not) please let me know 🙂.

Getting the App

Windows 10

If you’re running Windows 10, the easiest way to get the app is to instal it from the Microsoft Store here.

Windows 7, 8 & 8.1

To install the app on older versions of Windows download the installer (AdventurerClient-win.exe) from the lastest release here.

MacOS

To install the app on older versions of Windows download the macOS dmg (AdventurerClient-mac.dmg) from the lastest release here.

“Adventurer Client” cannot be opened because the developer cannot be verified.

Unfortunately, Apple requires that software running on macOS be signed and notarized so that they can verify its identity. Doing this would require me to buy an Apple Developer license which is quite expensive. Therefore, for the time being, the app is distributed unsigned (if I buy a developer license later on, I’ll submit this to the App Sotre). To run the app you need to perform the following steps, for the first run only.

  1. Double click on “Adventurer Client”
  2. At the “Adventurer Client” cannot be opened because the developer cannot be verified. message, click cancel
  3. Right click on the app and click open
  4. At the macOS cannot verify the developer of “Adventurer Client”. Are you sure you want to open it? message, click Open

Tech Details

I’ve published the app’s source under the MIT license on my GitHub. In order to easily support running on both Windows and Mac, it is implemented as an Angular app in an Electron wrapper. I was larning a lot about these technologies as I went, so if there are things that seem odd, your feedback (or pull requests) would be warmly welcomed.

Feedback

I this app is useful to some people, I plan on continueinf to tinker with it over time. If you have any feedback or suggestions, drop me a comment or a tweet on Twitter.

Buy Me A Coffee

Using the Monoprice Voxel (FlashForge Adventure 3) With Ultimaker Cura

Recently I bought a Monoprice Voxel (a rebranded FlashForge Adventurer 3) 3D printer, and I’ve spent the last couple of weeks getting to grips with it. I’m very impressed – it works well and I’ve had a lot of fun building parts of my projects.

One interesting this about the printer is that it comes with its own slicing software called FlashPrint. This seems to work quite well, slicing all the models I threw at it and sending them to the printer. However, I was curious if it was possible to use the printer with the Ultimaker Cura slicer, which has some more advanced features and is supported more widely by the community.

I did a load of research and found some interesting topics on reddit and Ultimaker forum, I also examined the .gx files produced by FlashPrint and thoes sent to the printer by PolarCloud. I’ve gathered all this together into a this guide for using Cura, but it stands on the shoulders of a whole bunch of other people in the community, so thanks to those people you really helped me figure all this out.

Update (January 2011): A YouTube user confirmed that these steps also work for the FlashForge Adventurer 3 Lite.

Disclaimer

Every model I have printed in this way has worked well and I am very pleased. However, follow this guide at your own risk – If something bad happens to your printer, on your own head be it.

Observations

FlashPrint and the printer appear to use a custom file format for printing – .gx. This is identical to the .g file used by other printers but with some additional metadata at the top. I suspect this is the image of the model that’s shown while printing, as well as the print time estimation.

The printer is perfectly happy to print .gcode files, provided the file extension is changed to .g first. While printing a .g file the time estimation on the printer screen does not count down the remaining time, it counts up the elapsed time. Also instead of a small image of the model being shown, a generic icon is displayed.

Update (November 2021): I’m hearing from some people that after updating the printer to the latest firmware, that they get a “file format error” on the printer when using Cura sliced files. It seems like FlashForge have changed something (deliberate or otherwise) that is blocking Cura. I don’t have a solution to this right now, if you have more information, do get in contact. If this works for you do not update the printer.

Getting Cura

Firstly, you need to install the latest version of Cura from the Ulimaker website.

Continue reading