State of the (IoT) Union 2022: Smart Home Year in Review

Hello again! It’s almost the end of the year, and I think it’s a good moment once again to run through the various smart home things I shared and how they’ve panned out after the post were published.

A pot noodle surrounded by tools including a soldering iron, wire cutters and a multi meater.

Bathroom Fan

Last year, I shared how had used a Shelly Relay, Home assistant and some humidity sensors to add some smarts to my bathroom fan. Since then, the system has been running un-modified and I am very impressed with its reliability. The only issue I’ve encountered is that as the fan switches on, sometimes the relay will reboot, and the fan would stop again. It was very irritating. This is caused because the fan cam sometimes causes electromagnetic interference as it starts and can be fixed with the installation of an RC snubber.

Smart Heating

One of the first things I wrote about here was how I built a smart heating system without damaging my property. Last year I mentioned that I was going to upgrade the system to also use Shelly relays.

I did, indeed, complete this project but didn’t really write about it. I’m really pleased with this upgrade, as it allows me to switch on an off individual heaters, rather than the entire properly at once. I created some somewhat elaborate Home Assistant automations to switch on only the rooms I need when I am working from home. Hopefully this should help me save some energy.

Cat Litter

In June, I wrote about my connected cat litter project, which I could use to track my cat’s health over time by automatically weighing her whenever she uses it. While getting it working at first was a little bit of a struggle – requiring me to film the litter tray to figure out how Ellie was using it that was causing issue – this has been incredibly reliable and a great success. I’m very happy with it.

A notification reading Ellie (3.65Kg) has left you a present in the litter box (20g)

Unfortunately, Ellie was a little ill early this year and lost a lost some weight. I’m pleased to say that she has made a full recovery now, and the smart litter was fantastic for tracking her recovery as she gained back a healthy weight.

Misc Smart Stuff

  • Automatic Blind – While renovating my bedroom, I added a very basic blackout blind, to stop the morning some from shining around the curtains and waking me up. In an Amazon sale I picked up an automated blind opener. I integrated this into Home Assistant, and I was really happy during the summer heatwave, that I could leave both the window and curtains open, for the best cooling, but have the blind shut itself just before sunrise.

  • The lights in both my bathroom and kitchen are both Ikea Tradfri GU10 spotlights. Initially I was pretty impressed with these as a cost effective solution to adding smart lights to rooms that require a lot of individual bulbs. However, during use, they’ve proven to be really fickle. I have one set connected to my Hue Bridge, and the other to a Zigbee card connected to my Home Assistant Pi. Both sets of lights exhibit odd behaviour where they will turn on really dull and then 30 seconds or so later, go to full brightness. This stopped for a while during summer, while they worked perfectly, but came back again – given they are installed in the roof space, I wonder if this is temperature related somehow?

  • Living in an older property, keeping an eye out for damp in cold weather is a way of life, I recently added a dehumidifier to keep a handle on the indoor humidity when cooking. To keep running costs down, I made use of the humidity & temperature sensors in each room to detect when it needs to be turned on and when it can be turned off again.

Looking Forward

I’ve got a few projects planned for 2023, some big and some small, but I’m going to keep them as a surprise for you. I also want to take a look at energy monitoring, possibly making use of the Home Assistant Glow project.

I hope you have a happy new year, and I’ll see you in 2023!

Internet of Poop: How (and Why) I Built a Smart Litter Tray

Naturally, we want our pets to be as healthy and happy as possible, and just as with humans, one valuable metric to know is their weight. Knowing the weight of our four-legged friends, not only helps us to verify that they have a healthy amount of body fat, but can also can be used to detect things early on that may need medical attention. As they cannot speak to us and tell us when don’t feel well, it is our duty to listen to all of the different signals we have to understand their wellbeing.

Photo of a black shorthair cat sitting.

That’s why I wanted to know the weight of my cat, Ellie. Unfortunately, she really dislikes being picked up or handled, even by people she trusts. This means, it’s not possible to weigh her on a bathroom scale, and the only datapoint I have is her yearly examination at the vets. 

I wanted to build something that would fit into her life to track her weight automatically, without any intervention. I decided to modify her litter box, so that on each visit it records her weight.

But WHY, Andy?

Okay I get it; you think it’s weird. So here are the main goals of the project: 

  • Track Ellie’s weight because I want to know how heavy she is without going to the vet
  • Learn something about how load cells work
  • Have fun building a new project
  • (Hopefully) Inspire others to try out new ideas and projects by sharing what I learned. 
  • Track the weight of poops because I thought that was funny. 

The Hardware

Rather than build the whole litter tray from scratch, I decided to build a platform that her existing litter tray would rest on. This platform would contain all the equipment necessary to detect when Ellie was using the litter and start taking measurements.

Continue reading

How I Hacked My Coffee Machine To Be Smart

Before the pandemic, when we started working from home, I used to make coffee a number of different ways, depending how I felt. I liked to experiment – sometimes I would use a V60, others a French Press, coffee syphon or espresso machine. This worked well on the weekends when I had time to experiment a little. However, when you need to grab a quick coffee between meetings, it turned into a real faff; there’s just no matching the convenience (if not the quality) of the office coffee machine.

My solution here was to pick up a Morphy Richards Verve filter coffee maker that I could leave running while I went about my work and come back to when it was done. I was really surprised with this machine, I was expecting to sacrifice a lot of quality for convenience, but with a little fine tuning on ground size and water quantity, its capable of producing some very drinkable coffee.  

Occasionally, though, I would get it brewing and forget to go back to collect the drink, leaving it going stale on the hot plate so I decided to see if I could connect it to my network for notifications and control.

My requirements were:

Continue reading

Adding RGB Light Strips To The Kitchen

Photo of the kitchen showing the installed lights

My kitchen has some pretty bright spotlights in it, but they’re only in use when you’re working in there – once you turn them off and leave, the room can be very dark and its kind of depressing when you walk past it. I wanted to add some warmth by putting some soft under cabinet lighting. 

I started in the Amazon end of summer sale by picking up the cheapest RGB strip lights on offer. I was a little worried that some of the reviews mentioned that the power pack was a a bit suspect and had exploded for a few people, so I decided to use an old generic laptop adapter I had lying around. I measured the power draw of the full 10m of lights to make sure it was powerful enough for the job.

The lights I bought came with an IR remote to control the brightness and colour, but I wanted to be able to control them though Home Assistant. I connected them up to a Shelly RGBW2 controller.

Because of the layout of the cupboards, I needed to fit the lights in several strips, so I bought some strip connectors from eBay, as well as an RGB strip extension cable, that I used to connect the sections together in series.  

Continue reading

How I Made My Bathroom Fan Smart

When I moved into my house, it came with this and old fan in the bathroom to keep the moisture down when you’ve had a shower, the bathroom itself is in the inside of the building and doesn’t have any external walls / windows, so the fan is really important to keeping it dry and non-moldy.

The original extractor worked well enough, but I’ve never really been that happy with it; it’s kind of noisy when running at full speed and has a trickle mode that runs it at low speed all the time – ostensibly this is to keep the room fresh, but in reality, means that the room Is always cold in the winter. It’s also not very well installed – is the case not fully closed on the fan focusing, and when I tried to close it up tightly the fan scraped the inside of the case and made an awful noise.

More recently the humidistat that makes it speed up automatically stopped working, meaning that after a shower the room would stay damp for hours afterwards. I’ve tried taking the fan apart and cleaning it in case it was just dust and grime of the sensor. But that didn’t help, so I set about replacing it. This being 2021 with nothing better to do, I decided to make it smart and control it from software.

After some research, I used a Manrose MF 100T inline fan, looking down the spec sheets, it is quieter, more electricity efferent and moves more air than the existing solution so seems like a great fit.

Photo of installed extractor fan in attic with inlet and outlet tubes.

To control the fan, I used a Shelly 1 relay – I’ve used some Shelly 1 PM relays in a couple of other places that I’ll write about soon, and I’ve so far been super happy with their ease of use and reliability.

Continue reading

State of the (IoT) Union 2020

It’s been a little while since I first started building IoT gizmos for my house and I’ve continued to improve and add to them so I thought it was a good time for an update on how some of the projects have fared, what’s new and what I’m thinking of for the next year.

2020 has been one hell of a year – My team and I have been lucky enough to be able to continue working from home and even managed to ship some products along the way. However, spending so much more time at home has caused me to spend more time thinking about my environment. Small irritations are magnified into daily hassles and new issues present themselves, giving opportunities to optimise my work from home life with more projects.

Smart Heating

Back in February I wrote about how I had modified my central heating be smart without damaging the property or replacing any of the components. This project was my first adventure into 3D printing and the ESP8266.

A year on, the system is still installed and running my heating on a daily basis. I am very pleased with how well it’s worked with only a few changes:

  • Missed MQTT messages – In the first few weeks, there were a few occasions where the heating would not turn on or off when instructed. When I investigated, it seemed that MQTT messages would not always be sent to the device when published. To work around this, I added code that forcibly checked the state every 10 mins and would perform the missed action if needed.
  • Restore previous state – In the original version of the project, the device would take the latest value published to the MQTT feed as the source of truth. However, this was problematic as if a new message was published while the device was not available for some reason, it would run out of sync – meaning that the heating would turn off then instructed to turn on and vice versa. To fix this I used the ESP8266’s SPIFFs storage to store the current state of the heating toggle and restore it after device restart.
  • Timing – The timing to switch the heating on and off is no longer powered by IFTTT, instead it is now powered by automations in Home Assistant, which allows me to create more complex programs.

Digital TV Recorder

In May I wrote about how I used Kodi and Tvheadend to build a TV recorder. This is still running and recording TV shows. I’m very happy that I can stream its recording through my home and watch them in the kitchen while cooking. I’m also really happy with the massive saving I’ve made by cancelling my paid TV contract. It’s not been without it hiccups though:

  • Live Pause – For some reason pausing live TV does not work as expected. I can pause and restart the broadcast , but a few seconds after restarting, playback fails and cannot be resumed. I don’t really watch much live TV, so I’ve not yet been sufficiently annoyed to investigate this.
  • Start-up Issues – On bout 50% of start-ups, Tvheadend fails to start and cannot be used. To resolve this, I have to manually stop and restart the service. I haven’t yet looked into what is causing the issue, but its high on my list.

Living Room eInk Display

The living room info display continues to function, and I use it a lot to know if it will rain when going out. However, with Apple’s acquisition of Dark Sky and subsequent deprecation of the API, I will need to update it at some point in 2021 to use some other data source. If you’ve any good suggestions of where to get similar information for, I’d love to hear them in the comments or on Twitter.

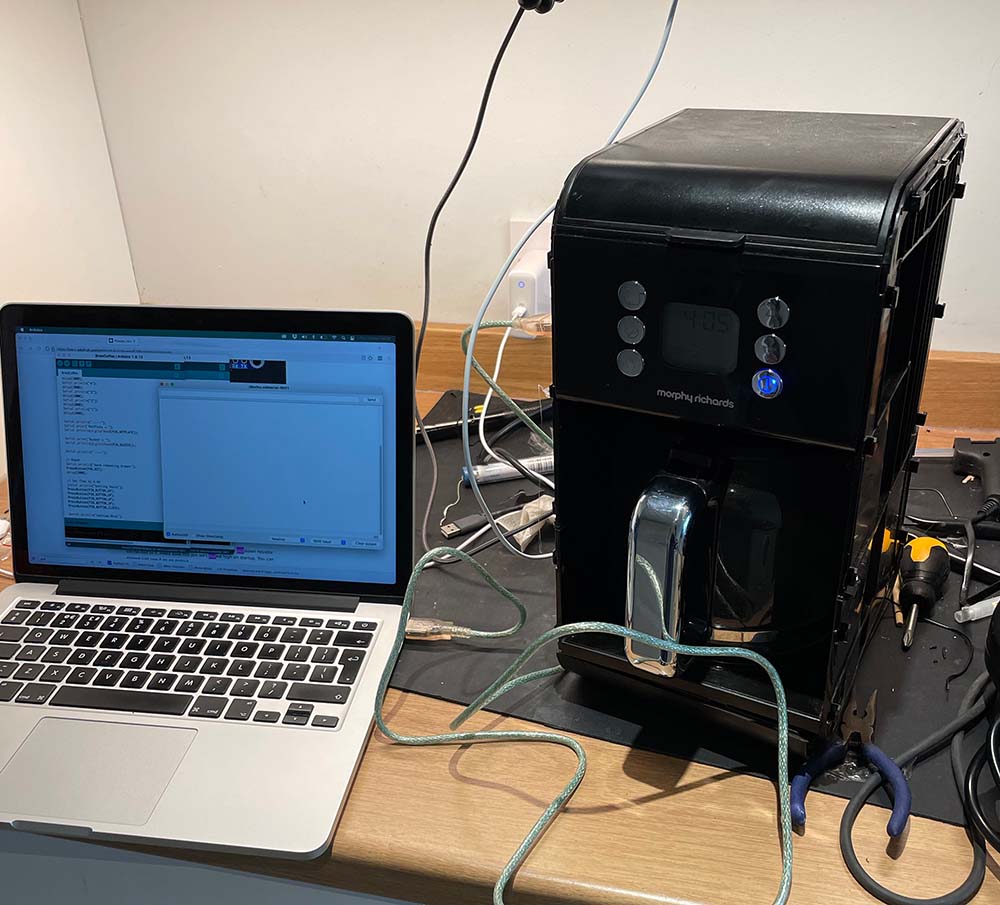
Air Quality Monitoring

I’d already been monitoring my air quality with my Arduino & Raspberry Pi for a while before I Wrote about it. Unfortunately, while building it a new case, I accidentally damaged the Raspberry Pi and OLED screen. As I always wanted to improve it, I descried to rebuild a whole new version using an ESP8266, utilising deep sleep mode, to create a device that is significantly smaller and more power efficient.

I was pleased with how neat this new version was when in a nice 3D printed box. I was very happy with its crazy low power consumption between air quality samples every five minutes. However, it has an issue – the temperature & humanity sensor is too close to the gas sensor, meaning that it suffers crazy self-heating to as much as 10c, which made its data very unreliable.

It still works as a volatile organic compound sensor, but I will need to re-think the board layout to get reliable data from the temperature and humidity again.
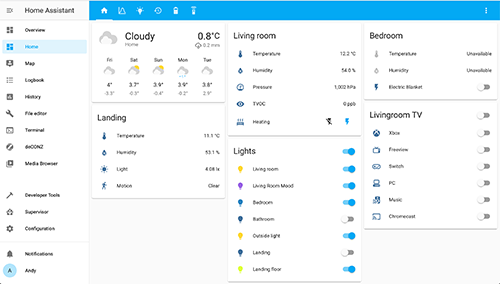
Home Assistant

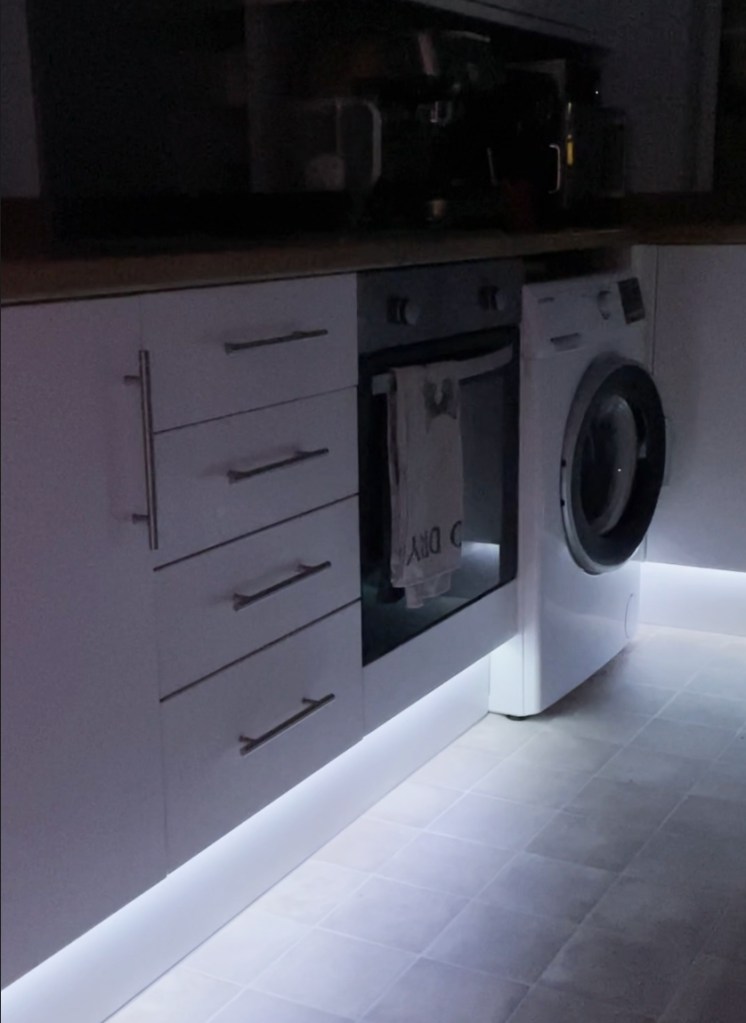
Over the year, I added yet another Raspberry Pi to my home, this time running Home Assistant. I’ve been really pleased with the power of automation I’ve set up with this. I’ve used it to automatically start the Roomba if I leave the house between certain times, automate the outside lighting and provide more powerful timing to the smart heating project.

I also added a Conbee Raspbee II to the Raspberry Pi, to allow it to communicate with Zigbee devices. I now have a Xiaomi temperature sensor in every room and a set of Ikea Trådfri lights in the bathroom. Eccentric as this may seem, its allowed for some really nice and inexpensive luxuries – such as turning the on heated blanket in the bed before bedtime if it is cold in the bedroom or adding mood lighting in the bathroom when you want to relax in the bath.

2021

I’m pretty pleased with some of the things I did over the last year, but I’m looking forward to building some even more cool things in 2021 and sharing them with you.

With working form home continuing to be necessary for the time being, I want to focus on improving my environment to keep it fresh, interesting and comfy as well as dealing some of the pain points while working. I’m going to be adding a lot more automations with Home Assistant as well as building out my smart lights through a const effective use of Hue and Ikea lights.

If you have any cool suggestions or ideas that you think I might be interested in, drop me a comment below or on Twitter.

Hope you have a great 2021! (Or at least a better one than 2020)

How I Made My Heating Smart Without Damaging Or Replacing Anything

I’ve previously mentioned that I wanted to upgrade my heating system so I could program it with more complex timings or control it form my phone. But there’s a catch: The house is rented, so the whole system must do no damage, be made only of removable parts and be installed without modifying any of the existing infrastructure.

In this post, I’ll talk about how I managed it, how it works and what the current state of the project is.

Background

My electric heating is controlled by a Timeguard RTS113 mechanical timer located awkwardly in a kitchen cupboard; it consists of a large outer ring that rotates once every 24 hours. On this ring, you push in red (on) or blue (off) plastic pegs (called tappets in the user manual) at the time you want the heating to turn on or off. As the peg passes a control spindle (representing the current time in the bottom right) it pushes it around approximately one eighth of a turn. Each eighth of a turn of the control spindle, toggles the heating on or off.

A second inner ring allows you to suppress the morning or afternoon schedule for a given day in the week. For example, you can have the heating come on at 6:00am and 7:00pm every day, except on Saturdays where it does not come on at 6:00am because the morning schedule is suppressed.

This works reasonably well, but it’s not very flexible – you pretty much a to live your life on the same schedule every day – if you deviate from it the heating is either wasting power while you’re out, or you’re freezing and have to reach into the cupboard to press the override button.

I’d love to have a smart thermostat such as Nest or Hive but they don’t support my electric heating and as this is a rental house, I’m not able to modify anything to support them.

What I Wanted To Do

The control spindle that is rotated by the pegs has a small slot on the top that can be turned manually using a screw driver to toggle the heating on an off. I can remove all of the pegs and use a stepper motor to very gently turn the spindle each time I want to change the heating state. I could then connect this to a controller that receives instructions from the internet, and write whatever software I wanted to run the schedule.

The Motor

Continue reading

Using the Monoprice Voxel (FlashForge Adventure 3) With Ultimaker Cura

Recently I bought a Monoprice Voxel (a rebranded FlashForge Adventurer 3) 3D printer, and I’ve spent the last couple of weeks getting to grips with it. I’m very impressed – it works well and I’ve had a lot of fun building parts of my projects.

One interesting this about the printer is that it comes with its own slicing software called FlashPrint. This seems to work quite well, slicing all the models I threw at it and sending them to the printer. However, I was curious if it was possible to use the printer with the Ultimaker Cura slicer, which has some more advanced features and is supported more widely by the community.

I did a load of research and found some interesting topics on reddit and Ultimaker forum, I also examined the .gx files produced by FlashPrint and thoes sent to the printer by PolarCloud. I’ve gathered all this together into a this guide for using Cura, but it stands on the shoulders of a whole bunch of other people in the community, so thanks to those people you really helped me figure all this out.

Update (January 2011): A YouTube user confirmed that these steps also work for the FlashForge Adventurer 3 Lite.

Disclaimer

Every model I have printed in this way has worked well and I am very pleased. However, follow this guide at your own risk – If something bad happens to your printer, on your own head be it.

Observations

FlashPrint and the printer appear to use a custom file format for printing – .gx. This is identical to the .g file used by other printers but with some additional metadata at the top. I suspect this is the image of the model that’s shown while printing, as well as the print time estimation.

The printer is perfectly happy to print .gcode files, provided the file extension is changed to .g first. While printing a .g file the time estimation on the printer screen does not count down the remaining time, it counts up the elapsed time. Also instead of a small image of the model being shown, a generic icon is displayed.

Update (November 2021): I’m hearing from some people that after updating the printer to the latest firmware, that they get a “file format error” on the printer when using Cura sliced files. It seems like FlashForge have changed something (deliberate or otherwise) that is blocking Cura. I don’t have a solution to this right now, if you have more information, do get in contact. If this works for you do not update the printer.

Getting Cura

Firstly, you need to install the latest version of Cura from the Ulimaker website.

Continue reading

New Project: Zero Damage Smart Heating in a Rental House

This is the first post in a series documenting my attempt to build a smart heating system for a rental house. Further posts will follow as I work on it.

I have electric heating in my house, powered by a central timer from the past. The timer is a masterpiece of engineering, but is incredibly crude by modern standards. I’d love a connected system such as Nest or Hive but these systems only support low voltage trigger systems found with most gas systems, not the high voltage switching I have.

So I want to build my own, It’ll be fun, educational and greatly improve my quality of life in the winter. There’s just one thing though: I don’t own the house, so whatever I do must be easily reverted / removed / undone. Also, I’m a software not an electrician so, in the name of safety, I am not re-wiring anything or changing how it currently works.

The Timer

The timer is a Timeguard RTS113, it supports switching the heating on or off once every 30 mins by inserting a red (on) or blue (off) tappet at the appropriate time. On an inner ring it supports suppressing this schedule for the morning or afternoon for any day in the week. For example, you can have the heating some on at 6:00am, and 7:00pm every day, except on Saturdays where it does not come on at 6am.

The tappets are attached to a rotating dial, which rotates once per 24 hours. Each tappet has a lug, that as it passes a control spindle, pushes it around an 8th of a turn. As the control spindle is rotated it toggles the heating on or off.

The Plan

The control spindle has a plastic screw slot on the top to help you see its current state when programming the timer. So, in theory, I can remove all of the tappets and turn the control spindle manually (and very gently) using a stepper motor each time I want to turn it on or off.

Proof of Concept

I picked up a suitable looking stepper motor and motor controller from The Pi Hut, and hot glued a washer to the end. By holding this in place I was able to turn the heating on an off by rotating the motor with an Arduino. Now to figure our a more permanent arrangement…

Next Steps

I’ve already used Tinkercad and made a driver head to fit over the motor shaft and engage with the timer’s control spindle (replacing the hot glue blob from the proof of concept), I’ll 3D print this and see how it goes. Then I need to design some kind of support to hold the motor in the correct place so I can let go of it.

The above gif was made using Paint 3D ❤️